为了方便我们每次启动,可以将安装目录的bin目录设置到环境变量的path中, bin 目录下是一些常用命令,比如 mongod 启动服务命令,mongo 客户端连接服务命令。
方式2:配置文件方式启动服务
在解压目录中新建 config 文件夹,该文件夹中新建配置文件 mongod.conf,内容如下:
1
2
3
storage:
    #The directory where the mongod instance stores its data.Default Value is "\data\db" on Windows.
    dbPath: E:\MongoDB\mongodb-win32-x86_64-2008plus-ssl-4.0.12\data\db
[root@localhost bin]# ./mongo --help MongoDB shell version v4.0.10 usage: ./mongo [options] [db address] [file names (ending in .js)] db address can be: foo foo database on local machine 192.168.0.5/foo foo database on 192.168.0.5 machine 192.168.0.5:9999/foo foo database on 192.168.0.5 machine on port 9999 Options: --shell run the shell after executing files --nodb don't connect to mongod on startup - no 'db address' arg expected --norc will not run the ".mongorc.js" file on start up --quiet be less chatty --port arg port to connect to --host arg server to connect to --eval arg evaluate javascript -h [ --help ] show this usage information --version show version information --verbose increase verbosity --ipv6 enable IPv6 support (disabled by default) --disableJavaScriptJIT disable the Javascript Just In Time compiler --enableJavaScriptJIT enable the Javascript Just In Time compiler --disableJavaScriptProtection allow automatic JavaScript function marshalling --retryWrites automatically retry write operations upon transient network errors --disableImplicitSessions do not automatically create and use implicit sessions --jsHeapLimitMB arg set the js scope's heap size limit
Authentication Options: -u [ --username ] arg username for authentication -p [ --password ] arg password for authentication --authenticationDatabase arg user source (defaults to dbname) --authenticationMechanism arg authentication mechanism --gssapiServiceName arg (=mongodb) Service name to use when authenticating using GSSAPI/Kerberos --gssapiHostName arg Remote host name to use for purpose of GSSAPI/Kerberos authentication
file names: a list of files to run. files have to end in .js and will exit after unless --shell is specified
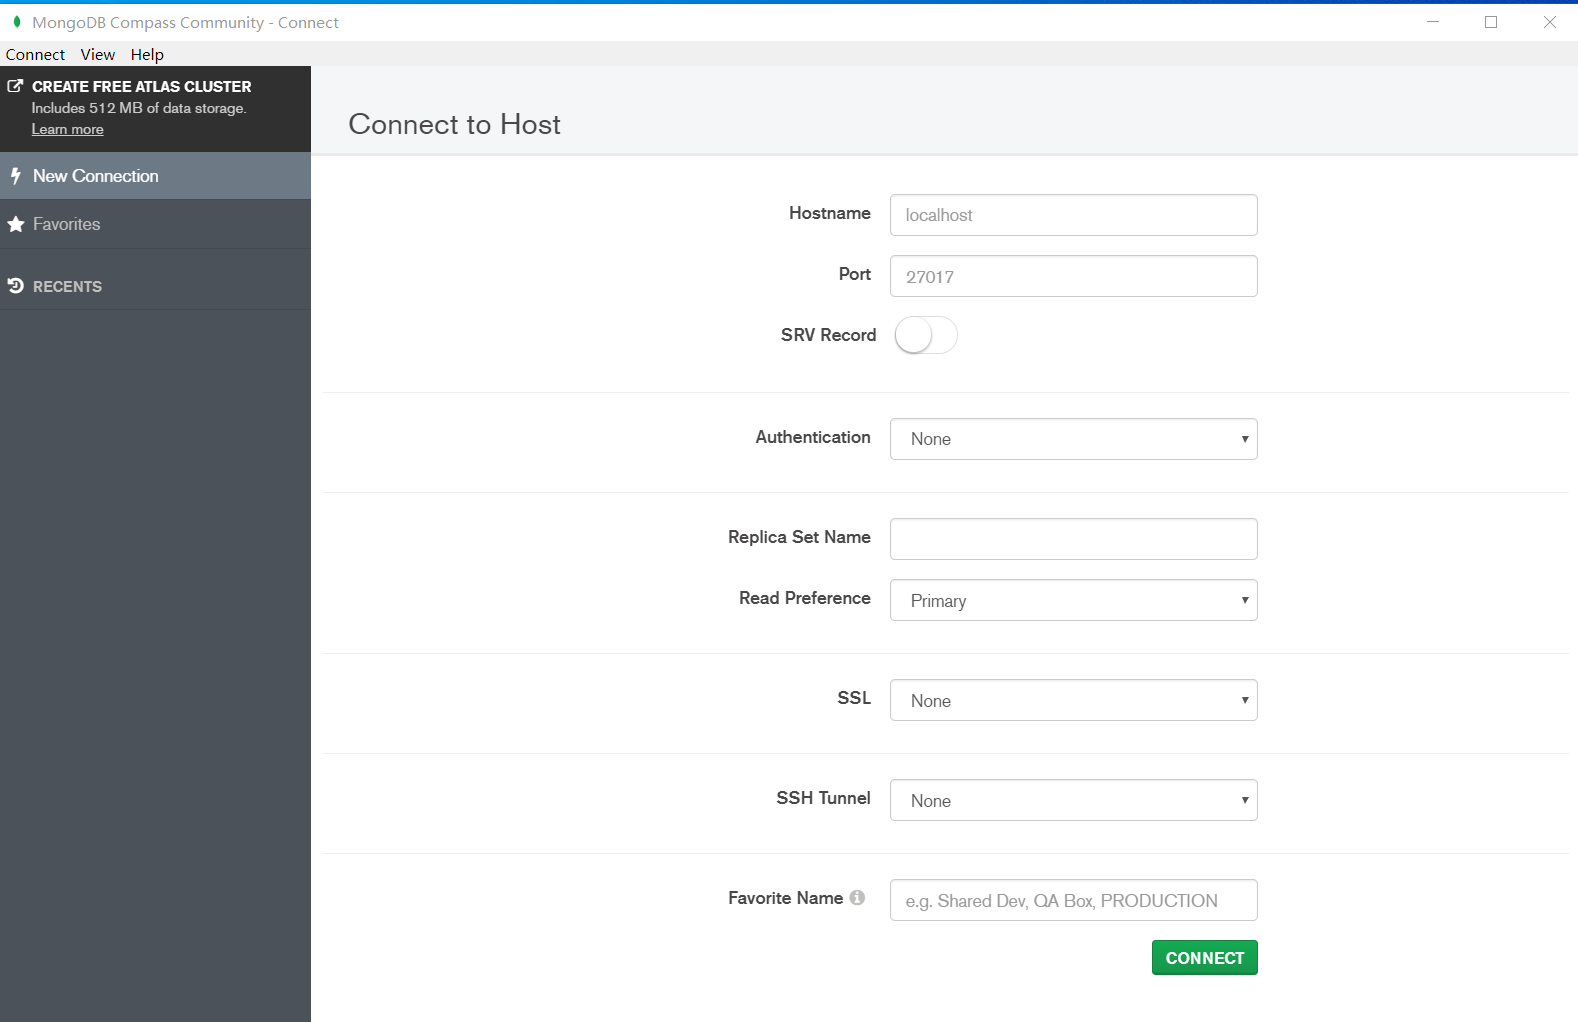
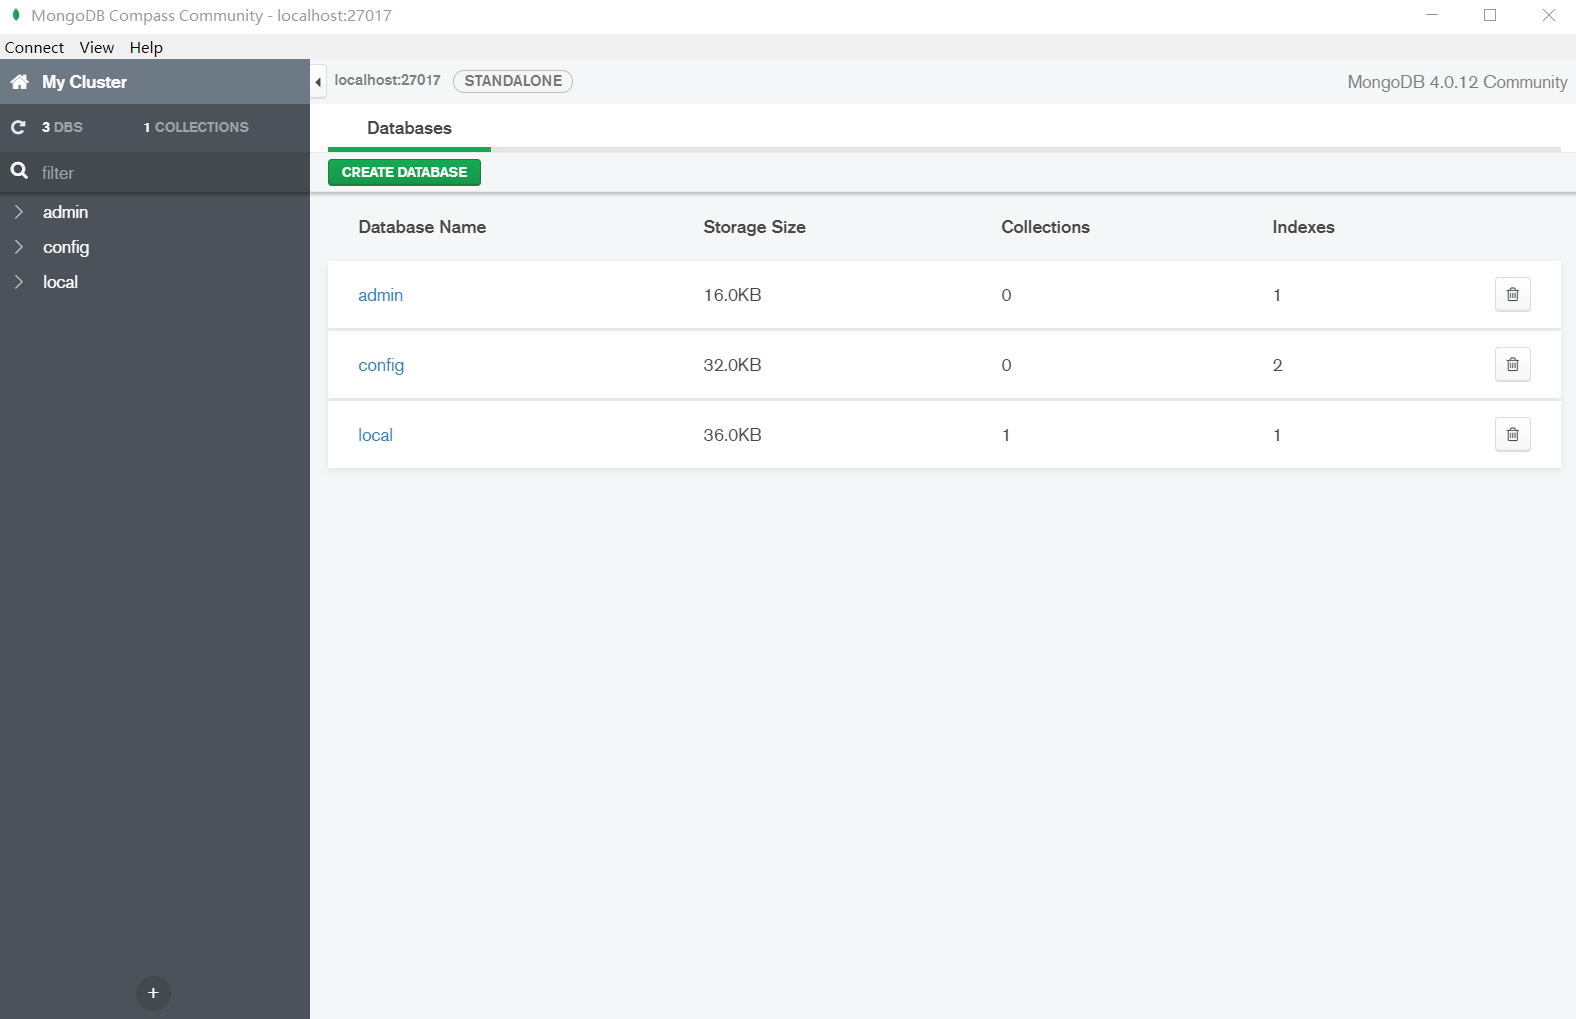
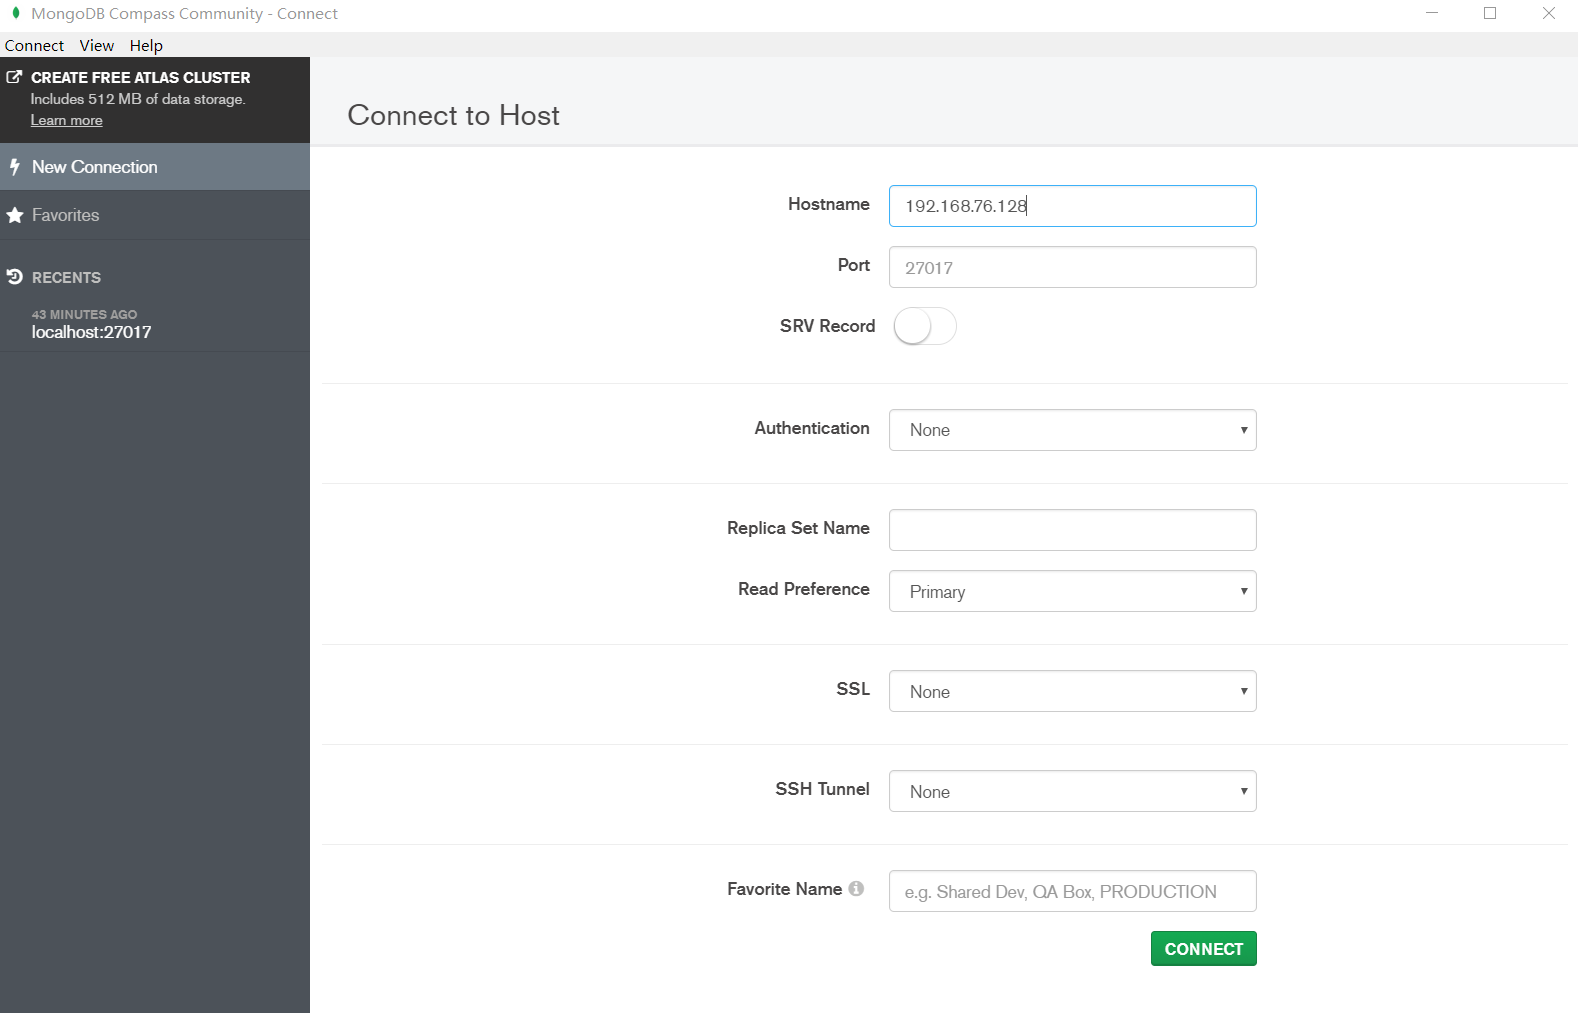
(2) Compass-图形化界面客户端
从 MongoDB 官网下载MongoDB Compass,下载 zip 压缩包,解压到本地,执行 MongoDBCompassCommunity.exe 文件
systemLog: # MongoDB发送所有日志输出的目标指定为文件 # #The path of the log file to which mongod or mongos should send all diagnostic logging information destination: file # mongod或mongos应向其发送所有诊断日志记录信息的日志文件的路径 path: "/mongodb/single/log/mongod.log" # 当mongos或mongod实例重新启动时,mongos或mongod会将新条目附加到现有日志文件的末尾。 logAppend: true storage: # mongod实例存储其数据的目录。storage.dbPath设置仅适用于mongod。 ##The directory where the mongod instance stores its data.Default Value is "/data/db". dbPath: "/mongodb/single/data/db" journal: # 启用或禁用持久性日志以确保数据文件保持有效和可恢复。 enabled: true processManagement: # 启用在后台运行mongos或mongod进程的守护进程模式。 fork: true net: # 服务实例绑定的IP,默认是localhost bindIp: localhost, 192.168.76.128 # bindIp # 绑定的端口,默认是27017 port: 27017
(5) 启动 MongoDB 服务
1
2
3
4
[root@localhost mongodb]# /usr/local/mongodb/mongodb-linux-x86_64-4.0.10/bin/mongod -f /mongodb/single/mongod.conf
about to fork child process, waiting until server is ready for connections.
forked process: 4586
child process started successfully, parent exiting
> use admin
switched to db admin
> db.shutdownServer()
server should be down...
2023-03-21T02:02:28.990+0800 I NETWORK  [js] trying reconnect to 127.0.0.1:27017 failed
2023-03-21T02:02:28.991+0800 I NETWORK  [js] reconnect 127.0.0.1:27017 failed failed
> exit
bye
2023-03-21T02:02:40.720+0800 I NETWORK  [js] trying reconnect to 127.0.0.1:27017 failed
2023-03-21T02:02:40.720+0800 I NETWORK  [js] reconnect 127.0.0.1:27017 failed failed
2023-03-21T02:02:40.720+0800 I QUERY    [js] Failed to end session { id: UUID("bd52ffb3-1a4c-40ab-a32a-7002d1ca0280") } due to SocketException: socket exception [CONNECT_ERROR] server [couldn't connect to server 127.0.0.1:27017, connection attempt failed: SocketException: Error connecting to 127.0.0.1:27017 :: caused by :: Connection refused]
[root@localhost bin]# ps -ef | grep mongod
root       6264   1909  0 02:02 pts/0    00:00:00 grep --color=auto mongod