1.分片集群-Sharded Cluster 分片(sharding)是一种跨多台机器分布数据的方法, MongoDB使用分片来支持具有非常大的数据集和高吞吐量操作的部署
MongoDB支持通过分片进行水平扩展
2.分片集群包含的组件 MongoDB分片群集包含以下组件:
分片(存储):每个分片包含分片数据的子集。 每个分片都可以部署为副本集。
mongos(路由):mongos充当查询路由器,在客户端应用程序和分片集群之间提供接口。
config servers(”调度”的配置):配置服务器存储群集的元数据和配置设置。 从MongoDB 3.4开始,必须将配置服务器部署为副本集(CSRS)。
3.分片集群架构目标 两个分片节点副本集(3+3)+一个配置节点副本集(3)+两个路由节点(2),共11个服务节点。
(1) 两个分片节点副本集
Shard_1:
PrimaryMongod1: 192.168.76.128: 27018
SecondaryMongod1: 192.168.76.128: 27118
ArbiterMongod1: 192.168.76.132: 27218
Shard_2:
PrimaryMongod1: 192.168.76.128: 27318
SecondaryMongod1: 192.168.76.128: 27418
ArbiterMongod1: 192.168.76.132: 27518
(2) 一个配置节点副本集
Config Server:
PrimaryComfig: 192.168.76.128: 27019
SecondaryConfig: 192.168.76.128: 27119
SecondaryConfig: 192.168.76.128: 27219
(3) 两个路由节点
(Router1)mongos1: 192.168.76.128: 27017
(Router2)mongos2: 192.168.76.128: 27117
4.分片(存储)节点副本集的创建 (1) 准备存放数据和日志的目录
1
2
3
4
5
6
mkdir -p /mongodb/sharded_cluster/myshardrs01_27018/log mkdir -p /mongodb/sharded_cluster/myshardrs01_27018/data/db mkdir -p /mongodb/sharded_cluster/myshardrs01_27118/log mkdir -p /mongodb/sharded_cluster/myshardrs01_27118/data/db mkdir -p /mongodb/sharded_cluster/myshardrs01_27218/log mkdir -p /mongodb/sharded_cluster/myshardrs01_27218/data/db
(2) 新建配置文件
1 vim /mongodb/sharded_cluster/myshardrs01_27218/mongod.conf
1
2
3
4
5
6
7
8
9
10
11
12
13
14
15
16
17
18
19
20
21
22
23
24
25
26
27
systemLog: #MongoDB发送所有日志输出的目标指定为文件 destination: file #mongod或mongos应向其发送所有诊断日志记录信息的日志文件的路径 path: "/mongodb/sharded_cluster/myshardrs01_27218/log/mongod.log" #当mongos或mongod实例重新启动时,mongos或mongod会将新条目附加到现有日志文件的末尾。 logAppend: true storage: #mongod实例存储其数据的目录。storage.dbPath设置仅适用于mongod。 dbPath: "/mongodb/sharded_cluster/myshardrs01_27218/data/db" journal: #启用或禁用持久性日志以确保数据文件保持有效和可恢复。 enabled: true processManagement: #启用在后台运行mongos或mongod进程的守护进程模式。 fork: true #指定用于保存mongos或mongod进程的进程ID的文件位置,其中mongos或mongod将写入其PID pidFilePath: "/mongodb/sharded_cluster/myshardrs01_27218/log/mongod.pid" net: #服务实例绑定的IP bindIp: localhost,192.168.76.132 #绑定的端口 port: 27218 replication: replSetName: myshardrs01 sharding: clusterRole: shardsvr
修改 ip 和 路径等配置
sharding.clusterRole 设置
(3) 依次启动三个mongod服务:
1
2
3
./mongod -f /mongodb/sharded_cluster/myshardrs01_27018/mongod.conf ./mongod -f /mongodb/sharded_cluster/myshardrs01_27118/mongod.conf ./mongod -f /mongodb/sharded_cluster/myshardrs01_27218/mongod.conf
(4) 初始化副本集和创建主节点
1 ./mongo --host=192.168.76.128 --port=27018
1
2
3
4
5
6
7
8
9
10
11
12
13
14
15
16
17
> rs.initiate() { "info2" : "no configuration specified. Using a default configuration for the set", "me" : "192.168.76.128:27018", "ok" : 1, "operationTime" : Timestamp(1679698502, 1), "$clusterTime" : { "clusterTime" : Timestamp(1679698502, 1), "signature" : { "hash" : BinData(0,"AAAAAAAAAAAAAAAAAAAAAAAAAAA="), "keyId" : NumberLong(0) } } } myshardrs01:SECONDARY> myshardrs01:PRIMARY> myshardrs01:PRIMARY>
(5) 添加副本节点
1
2
3
4
5
6
7
8
9
10
11
12
myshardrs01:PRIMARY> rs.add("192.168.76.128:27118") { "ok" : 1, "operationTime" : Timestamp(1679698547, 1), "$clusterTime" : { "clusterTime" : Timestamp(1679698547, 1), "signature" : { "hash" : BinData(0,"AAAAAAAAAAAAAAAAAAAAAAAAAAA="), "keyId" : NumberLong(0) } } }
(6) 添加仲裁节点
1
2
3
4
5
6
7
8
9
10
11
12
myshardrs01:PRIMARY> rs.addArb("192.168.76.132:27218") { "ok" : 1, "operationTime" : Timestamp(1679698567, 1), "$clusterTime" : { "clusterTime" : Timestamp(1679698567, 1), "signature" : { "hash" : BinData(0,"AAAAAAAAAAAAAAAAAAAAAAAAAAA="), "keyId" : NumberLong(0) } } }
5.配置节点副本集的创建 (1) 新建存放数据和日志的目录
1
2
3
4
5
6
mkdir -p /mongodb/sharded_cluster/myconfigrs_27019/log mkdir -p /mongodb/sharded_cluster/myconfigrs_27019/data/db mkdir -p /mongodb/sharded_cluster/myconfigrs_27119/log mkdir -p /mongodb/sharded_cluster/myconfigrs_27119/data/db mkdir -p /mongodb/sharded_cluster/myconfigrs_27219/log mkdir -p /mongodb/sharded_cluster/myconfigrs_27219/data/db
(2) 新建配置文件
1 vim /mongodb/sharded_cluster/myconfigrs_27219/mongod.conf
1
2
3
4
5
6
7
8
9
10
11
12
13
14
15
16
17
18
19
20
21
22
23
24
25
26
27
28
29
systemLog: #MongoDB发送所有日志输出的目标指定为文件 destination: file #mongod或mongos应向其发送所有诊断日志记录信息的日志文件的路径 path: "/mongodb/sharded_cluster/myconfigrs_27219/log/mongod.log" #当mongos或mongod实例重新启动时,mongos或mongod会将新条目附加到现有日志文件的末尾。 logAppend: true storage: #mongod实例存储其数据的目录。storage.dbPath设置仅适用于mongod。 dbPath: "/mongodb/sharded_cluster/myconfigrs_27219/data/db" journal: #启用或禁用持久性日志以确保数据文件保持有效和可恢复。 enabled: true processManagement: #启用在后台运行mongos或mongod进程的守护进程模式。 fork: true #指定用于保存mongos或mongod进程的进程ID的文件位置,其中mongos或mongod将写入其PID pidFilePath: "/mongodb/sharded_cluster/myconfigrs_27219/log/mongod.pid" net: #服务实例绑定所有IP #bindIpAll: true #服务实例绑定的IP bindIp: localhost,192.168.0.2 #绑定的端口 port: 27219 replication: replSetName: myconfigrs sharding: clusterRole: configsvr
修改 ip 和 路径等配置
(3) 依次启动三个mongod服务:
1
2
3
./mongod -f /mongodb/sharded_cluster/myconfigrs_27019/mongod.conf ./mongod -f /mongodb/sharded_cluster/myconfigrs_27119/mongod.conf ./mongod -f /mongodb/sharded_cluster/myconfigrs_27219/mongod.conf
(4) 初始化副本集和创建主节点
1 ./mongo --host=192.168.76.128 --port=27019
1
2
3
4
5
6
7
8
9
10
11
12
13
14
15
16
17
18
19
20
21
> rs.initiate() { "info2" : "no configuration specified. Using a default configuration for the set", "me" : "192.168.76.128:27019", "ok" : 1, "operationTime" : Timestamp(1679744224, 1), "$gleStats" : { "lastOpTime" : Timestamp(1679744224, 1), "electionId" : ObjectId("000000000000000000000000") }, "lastCommittedOpTime" : Timestamp(0, 0), "$clusterTime" : { "clusterTime" : Timestamp(1679744224, 1), "signature" : { "hash" : BinData(0,"AAAAAAAAAAAAAAAAAAAAAAAAAAA="), "keyId" : NumberLong(0) } } } myconfigrs:SECONDARY> myconfigrs:PRIMARY>
(5) 添加副本节点
1
2
myconfigrs:PRIMARY> rs.add("192.168.76.128:27119") myconfigrs:PRIMARY> rs.add("192.168.76.128:27219")
(6) 查看副本集状态
1 myconfigrs:PRIMARY> rs.status()
6.路由节点的创建 (1) 新建存放日志的目录(路由节点不存放数据)
1 mkdir -p /mongodb/sharded_cluster/mymongos_27017/log
(2) 新建配置文件
1 vim /mongodb/sharded_cluster/mymongos_27017/mongos.conf
1
2
3
4
5
6
7
8
9
10
11
12
13
14
15
16
17
18
19
20
21
22
23
systemLog: #MongoDB发送所有日志输出的目标指定为文件 destination: file #mongod或mongos应向其发送所有诊断日志记录信息的日志文件的路径 path: "/mongodb/sharded_cluster/mymongos_27017/log/mongod.log" #当mongos或mongod实例重新启动时,mongos或mongod会将新条目附加到现有日志文件的末尾。 logAppend: true processManagement: #启用在后台运行mongos或mongod进程的守护进程模式。 fork: true #指定用于保存mongos或mongod进程的进程ID的文件位置,其中mongos或mongod将写入其PID pidFilePath: "/mongodb/sharded_cluster/mymongos_27017/log/mongod.pid" net: #服务实例绑定所有IP,有副作用,副本集初始化的时候,节点名字会自动设置为本地域名,而不是ip #bindIpAll: true #服务实例绑定的IP bindIp: localhost,192.168.76.128 #bindIp #绑定的端口 port: 27017 sharding: #指定配置节点副本集 configDB: myconfigrs/192.168.76.128:27019,192.168.76.128:27119,192.168.76.128:27219
(3) 启动 mongos 服务
使用 mongos 启动
1 ./mongos -f /mongodb/sharded_cluster/mymongos_27017/mongos.conf
(4) 登录 mongos
1 ./mongo --host=192.168.76.128 --port=27017
1
2
3
4
5
6
7
8
9
10
11
12
13
14
15
16
17
18
mongos> show dbs admin 0.000GB config 0.000GB mongos> db.aa.insert({aa:"aa"}) WriteCommandError({ "ok" : 0, "errmsg" : "unable to initialize targeter for write op for collection test.aa :: caused by :: Database test not found :: caused by :: No shards found", "code" : 70, "codeName" : "ShardNotFound", "operationTime" : Timestamp(1679752659, 2), "$clusterTime" : { "clusterTime" : Timestamp(1679752659, 2), "signature" : { "hash" : BinData(0,"AAAAAAAAAAAAAAAAAAAAAAAAAAA="), "keyId" : NumberLong(0) } } })
此时路由节点无法写入数据
原因: 通过路由节点操作,现在只是连接了配置节点,还没有连接分片数据节点,因此无法写入业务数据
7.在路由节点上进行分片配置操作 (1) 添加分片
1
2
3
4
5
6
7
8
9
10
11
12
13
14
15
16
17
18
19
20
21
22
23
24
25
26
mongos> sh.addShard("myshardrs01/192.168.76.128:27018,192.168.76.128:27118,192.168.76.132:27218") { "shardAdded" : "myshardrs01", "ok" : 1, "operationTime" : Timestamp(1679764093, 4), "$clusterTime" : { "clusterTime" : Timestamp(1679764093, 4), "signature" : { "hash" : BinData(0,"AAAAAAAAAAAAAAAAAAAAAAAAAAA="), "keyId" : NumberLong(0) } } } mongos> sh.addShard("myshardrs02/192.168.76.128:27318,192.168.76.128:27418,192.168.76.132:27518") { "shardAdded" : "myshardrs02", "ok" : 1, "operationTime" : Timestamp(1679764186, 4), "$clusterTime" : { "clusterTime" : Timestamp(1679764186, 4), "signature" : { "hash" : BinData(0,"AAAAAAAAAAAAAAAAAAAAAAAAAAA="), "keyId" : NumberLong(0) } } }
查看分片状态
1
2
3
4
5
6
7
8
9
10
11
12
13
14
15
16
17
18
19
20
21
22
23
24
25
26
27
28
29
30
mongos> sh.status() --- Sharding Status --- sharding version: { "_id" : 1, "minCompatibleVersion" : 5, "currentVersion" : 6, "clusterId" : ObjectId("641edce2d3a527c9d6048484") } shards: { "_id" : "myshardrs01", "host" : "myshardrs01/192.168.76.128:27018,192.168.76.128:27118", "state" : 1 } { "_id" : "myshardrs02", "host" : "myshardrs02/192.168.76.128:27318,192.168.76.128:27418", "state" : 1 } active mongoses: "4.0.10" : 1 autosplit: Currently enabled: yes balancer: Currently enabled: yes Currently running: no Failed balancer rounds in last 5 attempts: 0 Migration Results for the last 24 hours: No recent migrations databases: { "_id" : "config", "primary" : "config", "partitioned" : true } config.system.sessions shard key: { "_id" : 1 } unique: false balancing: true chunks: myshardrs01 1 { "_id" : { "$minKey" : 1 } } -->> { "_id" : { "$maxKey" : 1 } } on : myshardrs01 Timestamp(1, 0)
(2) 开启分片功能
1 sh.enableSharding([database_name])
1
2
3
4
5
6
7
8
9
10
11
12
mongos> sh.enableSharding("articledb") { "ok" : 1, "operationTime" : Timestamp(1679764586, 5), "$clusterTime" : { "clusterTime" : Timestamp(1679764586, 5), "signature" : { "hash" : BinData(0,"AAAAAAAAAAAAAAAAAAAAAAAAAAA="), "keyId" : NumberLong(0) } } }
(3) 集合分片
1 sh.shardCollection([namespace(<database>.<collection>)], [key])
分片规则:
哈希策略
1
2
3
4
5
6
7
8
9
10
11
12
13
14
mongos> sh.shardCollection("articledb.comment", {"nickname": "hashed"}) { "collectionsharded" : "articledb.comment", "collectionUUID" : UUID("092d3f5f-2a7a-4cb7-adc0-e37e67c66b3d"), "ok" : 1, "operationTime" : Timestamp(1679764858, 17), "$clusterTime" : { "clusterTime" : Timestamp(1679764858, 17), "signature" : { "hash" : BinData(0,"AAAAAAAAAAAAAAAAAAAAAAAAAAA="), "keyId" : NumberLong(0) } } }
范围策略
1
2
3
4
5
6
7
8
9
10
11
12
13
14
mongos> sh.shardCollection("articledb.author", {"age": 1}) { "collectionsharded" : "articledb.author", "collectionUUID" : UUID("e9bf16e0-07d2-4df1-9d68-c02475d88feb"), "ok" : 1, "operationTime" : Timestamp(1679769560, 13), "$clusterTime" : { "clusterTime" : Timestamp(1679769560, 13), "signature" : { "hash" : BinData(0,"AAAAAAAAAAAAAAAAAAAAAAAAAAA="), "keyId" : NumberLong(0) } } }
查看分片状态
1
2
3
4
5
6
7
8
9
10
11
12
13
14
15
16
17
18
19
20
21
22
23
24
25
26
27
28
29
30
31
32
33
34
35
36
37
38
39
40
41
42
43
44
45
46
47
48
49
mongos> sh.status() --- Sharding Status --- sharding version: { "_id" : 1, "minCompatibleVersion" : 5, "currentVersion" : 6, "clusterId" : ObjectId("641edce2d3a527c9d6048484") } shards: { "_id" : "myshardrs01", "host" : "myshardrs01/192.168.76.128:27018,192.168.76.128:27118", "state" : 1 } { "_id" : "myshardrs02", "host" : "myshardrs02/192.168.76.128:27318,192.168.76.128:27418", "state" : 1 } active mongoses: "4.0.10" : 1 autosplit: Currently enabled: yes balancer: Currently enabled: yes Currently running: no Failed balancer rounds in last 5 attempts: 0 Migration Results for the last 24 hours: No recent migrations databases: { "_id" : "articledb", "primary" : "myshardrs02", "partitioned" : true, "version" : { "uuid" : UUID("8934badb-2e9c-4e20-931b-016dd8e6f5ce"), "lastMod" : 1 } } articledb.author shard key: { "age" : 1 } unique: false balancing: true chunks: myshardrs02 1 { "age" : { "$minKey" : 1 } } -->> { "age" : { "$maxKey" : 1 } } on : myshardrs02 Timestamp(1, 0) articledb.comment shard key: { "nickname" : "hashed" } unique: false balancing: true chunks: myshardrs01 2 myshardrs02 2 { "nickname" : { "$minKey" : 1 } } -->> { "nickname" : NumberLong("-4611686018427387902") } on : myshardrs01 Timestamp(1, 0) { "nickname" : NumberLong("-4611686018427387902") } -->> { "nickname" : NumberLong(0) } on : myshardrs01 Timestamp(1, 1) { "nickname" : NumberLong(0) } -->> { "nickname" : NumberLong("4611686018427387902") } on : myshardrs02 Timestamp(1, 2) { "nickname" : NumberLong("4611686018427387902") } -->> { "nickname" : { "$maxKey" : 1 } } on : myshardrs02 Timestamp(1, 3) { "_id" : "config", "primary" : "config", "partitioned" : true } config.system.sessions shard key: { "_id" : 1 } unique: false balancing: true chunks: myshardrs01 1 { "_id" : { "$minKey" : 1 } } -->> { "_id" : { "$maxKey" : 1 } } on : myshardrs01 Timestamp(1, 0)
显示集群的详细信息:
1 mongos> db.printShardingStatus()
查看均衡器是否工作(需要重新均衡时系统才会自动启动)
1
2
mongos> sh.isBalancerRunning() false
查看当前Balancer状态:
1
2
mongos> sh.getBalancerState() true
8.向分片插入数据进行测试 登录路由节点进行数据插入
(1) 哈希策略
路由节点
1
2
3
4
5
6
7
8
mongos> use articledb switched to db articledb mongos> db articledb mongos> for(var i=1;i<=1000;i++) {db.comment.insert({_id:i+"",nickname:"AbcD"+i})} WriteResult({ "nInserted" : 1 }) mongos> db.comment.count() 1000
分片副本集1
1
2
3
4
myshardrs01:PRIMARY> use articledb switched to db articledb myshardrs01:PRIMARY> db.comment.count() 505
查看当前集合的情况
1 myshardrs01:PRIMARY> db.comment.stats()
分片副本集2
1
2
3
4
myshardrs02:PRIMARY> use articledb switched to db articledb myshardrs02:PRIMARY> db.comment.count() 495
查看当前集合的情况
1 myshardrs02:PRIMARY> db.comment.stats()
查看本库内所有集合的分片信息
1
2
3
4
5
6
7
8
9
10
11
12
mongos> sh.status() articledb.comment shard key: { "nickname" : "hashed" } unique: false balancing: true chunks: myshardrs01 2 myshardrs02 2 { "nickname" : { "$minKey" : 1 } } -->> { "nickname" : NumberLong("-4611686018427387902") } on : myshardrs01 Timestamp(1, 0) { "nickname" : NumberLong("-4611686018427387902") } -->> { "nickname" : NumberLong(0) } on : myshardrs01 Timestamp(1, 1) { "nickname" : NumberLong(0) } -->> { "nickname" : NumberLong("4611686018427387902") } on : myshardrs02 Timestamp(1, 2) { "nickname" : NumberLong("4611686018427387902") } -->> { "nickname" : { "$maxKey" : 1 } } on : myshardrs02 Timestamp(1, 3)
(2) 范围策略
路由节点
1
2
3
4
5
mongos> use articledb switched to db articledb mongos> for(var i=1;i<=20000;i++) {db.author.save({"name": "aaaaaabbbbbbbccccccddddd"+i,"age":NumberInt(i%120)})} mongos> db.author.count() 20000
查看副本集状况
1
2
3
4
5
6
7
8
9
10
11
12
13
14
15
16
17
mongos> sh.status() articledb.author shard key: { "age" : 1 } unique: false balancing: true chunks: myshardrs01 4 myshardrs02 5 { "age" : { "$minKey" : 1 } } -->> { "age" : 0 } on : myshardrs01 Timestamp(2, 0) { "age" : 0 } -->> { "age" : 20 } on : myshardrs01 Timestamp(3, 0) { "age" : 20 } -->> { "age" : 41 } on : myshardrs01 Timestamp(4, 0) { "age" : 41 } -->> { "age" : 46 } on : myshardrs01 Timestamp(5, 0) { "age" : 46 } -->> { "age" : 67 } on : myshardrs02 Timestamp(5, 1) { "age" : 67 } -->> { "age" : 88 } on : myshardrs02 Timestamp(2, 3) { "age" : 88 } -->> { "age" : 92 } on : myshardrs02 Timestamp(2, 4) { "age" : 92 } -->> { "age" : 111 } on : myshardrs02 Timestamp(3, 1) { "age" : 111 } -->> { "age" : { "$maxKey" : 1 } } on : myshardrs02 Timestamp(4, 1)
分片副本集1
1
2
3
4
5
myshardrs01:PRIMARY> use articledb switched to db articledb myshardrs01:PRIMARY> db.author.count() 7681 myshardrs01:PRIMARY> db.author.find()
分片副本集2
1
2
3
4
5
myshardrs02:PRIMARY> use articledb switched to db articledb myshardrs02:PRIMARY> db.author.count() 12319 myshardrs02:PRIMARY> db.author.find()
提示:
如果查看状态发现没有分片,则可能是由于以下原因造成了:
1)系统繁忙,正在分片中。
1
2
3
mongos> use config mongos> db.settings.save( { _id:"chunksize", value: 1 } ) WriteResult({ "nMatched" : 0, "nUpserted" : 1, "nModified" : 0, "_id" : "chunksize" })
测试完再修改回来:
1
2
mongos> db.settings.save( { _id:"chunksize", value: 64 } ) WriteResult({ "nMatched" : 1, "nUpserted" : 0, "nModified" : 1 })
9.再增加一个路由节点 (1) 新建存放日志的目录
1 mkdir -p /mongodb/sharded_cluster/mymongos_27117/log
(2) 新建配置文件
1 vim /mongodb/sharded_cluster/mymongos_27117/mongos.conf
1
2
3
4
5
6
7
8
9
10
11
12
13
14
15
16
17
18
19
20
21
22
systemLog: #MongoDB发送所有日志输出的目标指定为文件 destination: file #mongod或mongos应向其发送所有诊断日志记录信息的日志文件的路径 path: "/mongodb/sharded_cluster/mymongos_27117/log/mongod.log" #当mongos或mongod实例重新启动时,mongos或mongod会将新条目附加到现有日志文件的末尾。 logAppend: true processManagement: #启用在后台运行mongos或mongod进程的守护进程模式。 fork: true #指定用于保存mongos或mongod进程的进程ID的文件位置,其中mongos或mongod将写入其PID pidFilePath: "/mongodb/sharded_cluster/mymongos_27117/log/mongod.pid" net: #服务实例绑定所有IP,有副作用,副本集初始化的时候,节点名字会自动设置为本地域名,而不是ip #bindIpAll: true #服务实例绑定的IP bindIp: localhost,192.168.76.128 #bindIp #绑定的端口 port: 27117 sharding: configDB: myconfigrs/192.168.76.128:27019,192.168.76.128:27119,192.168.76.128:27219
(3) 启动路由节点
1 ./mongos -f /mongodb/sharded_cluster/mymongos_27117/mongos.conf
第二个路由无需配置分片信息,因为分片配置都保存到了配置服务器中了
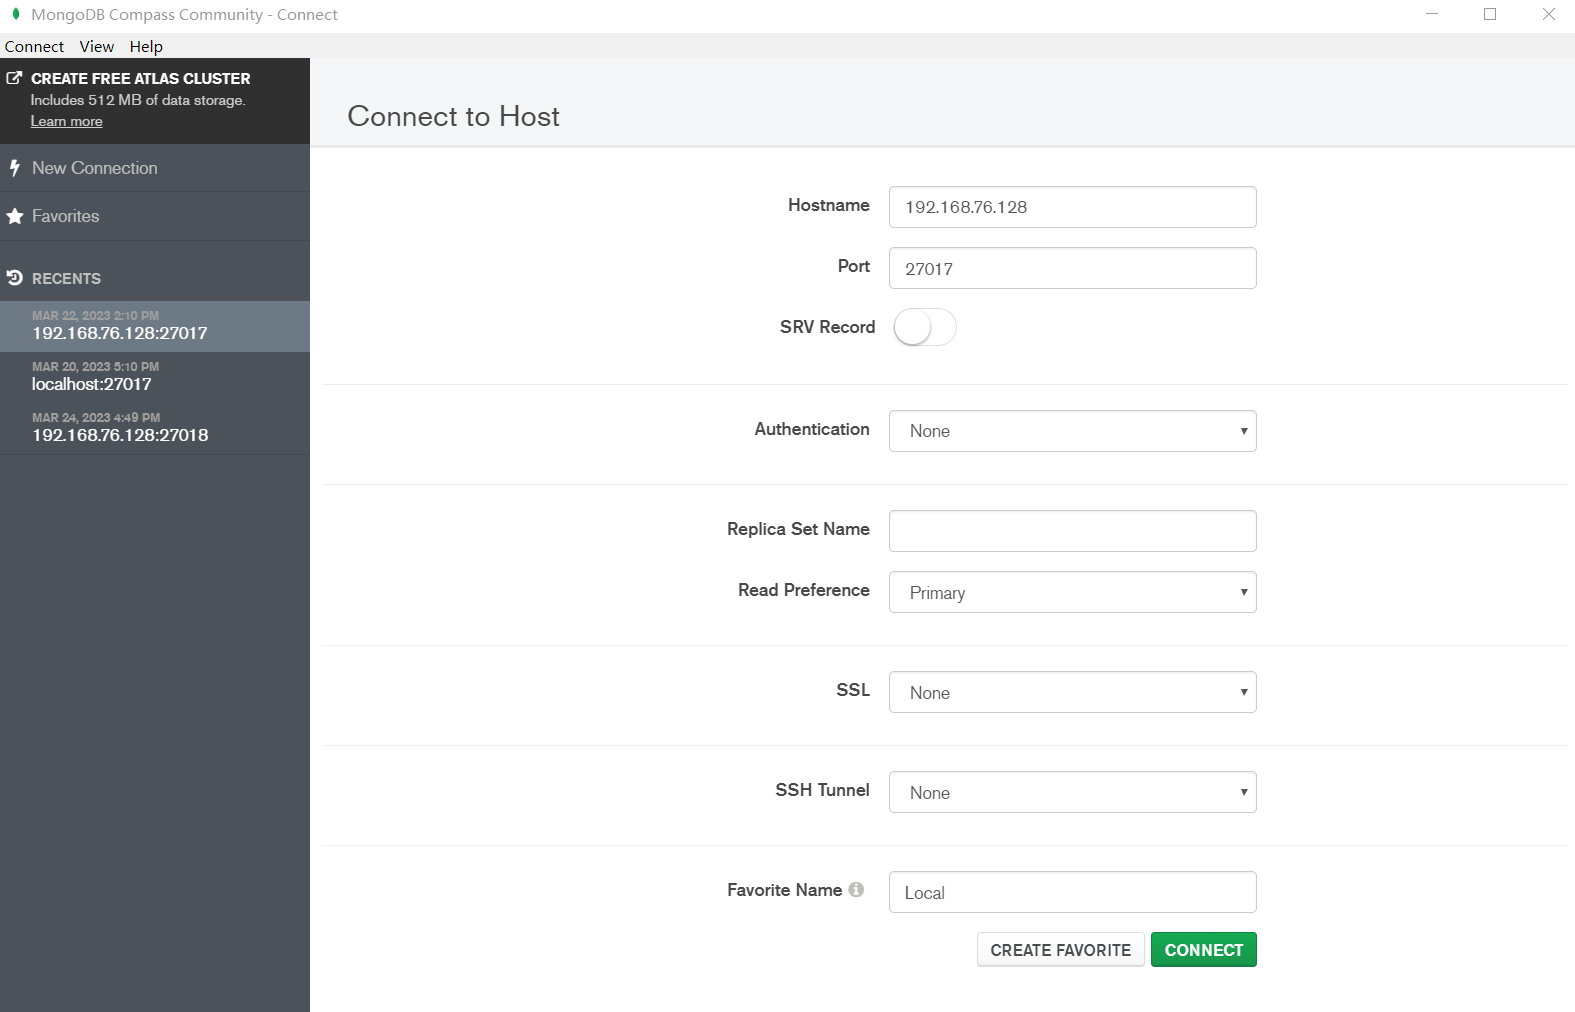
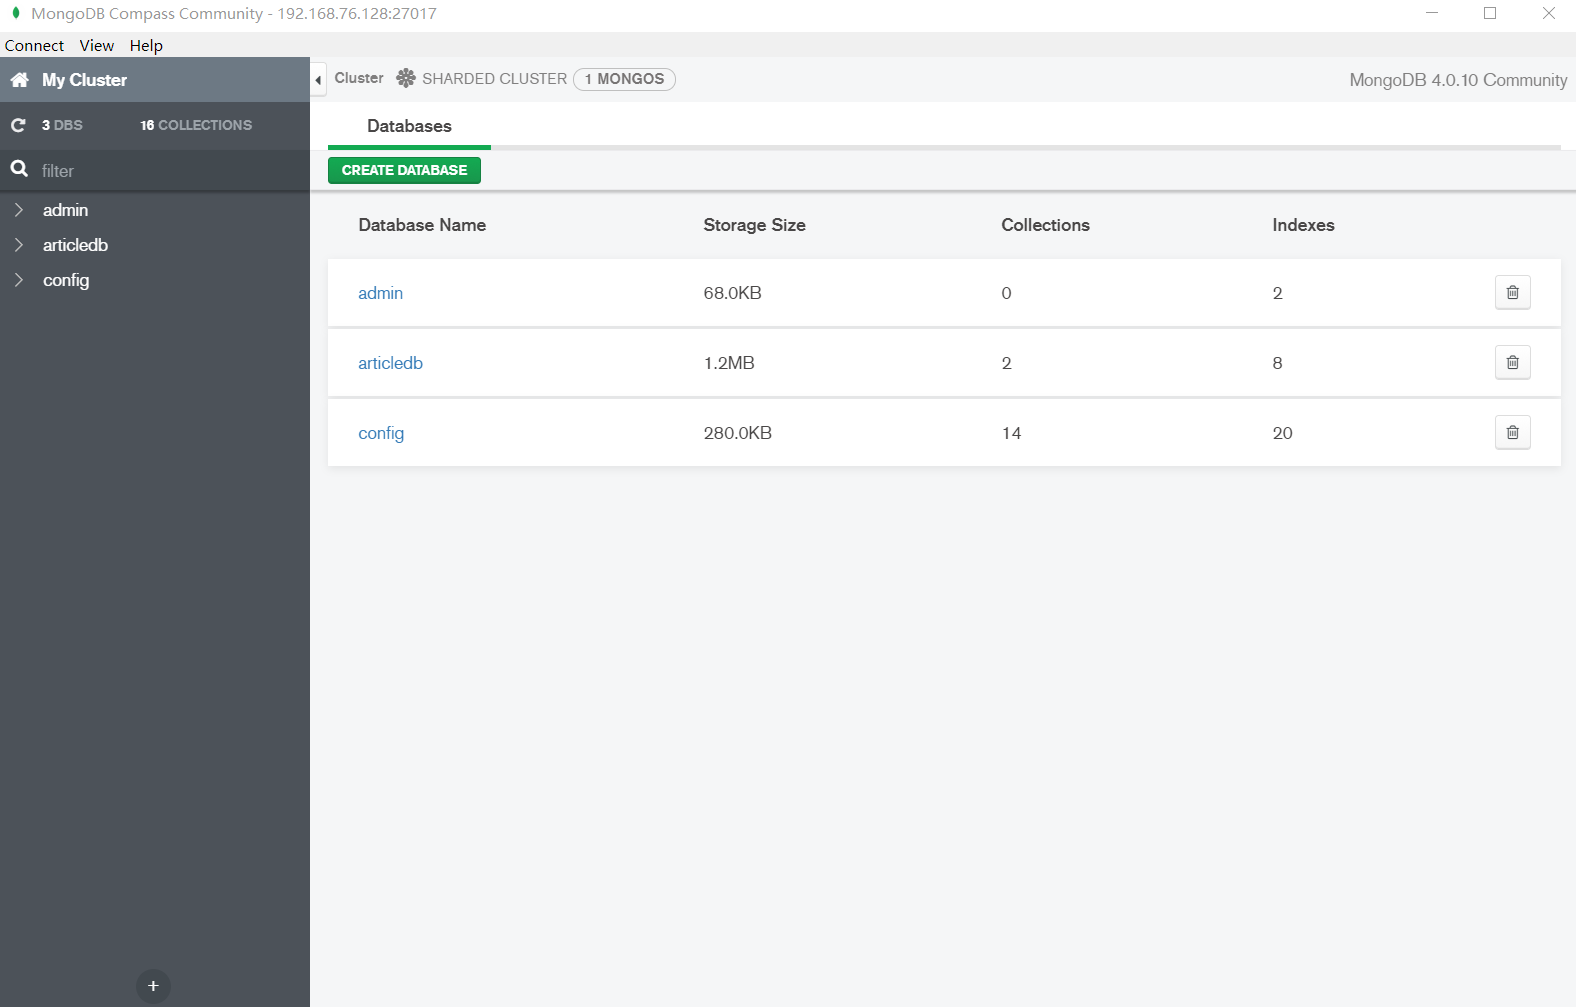
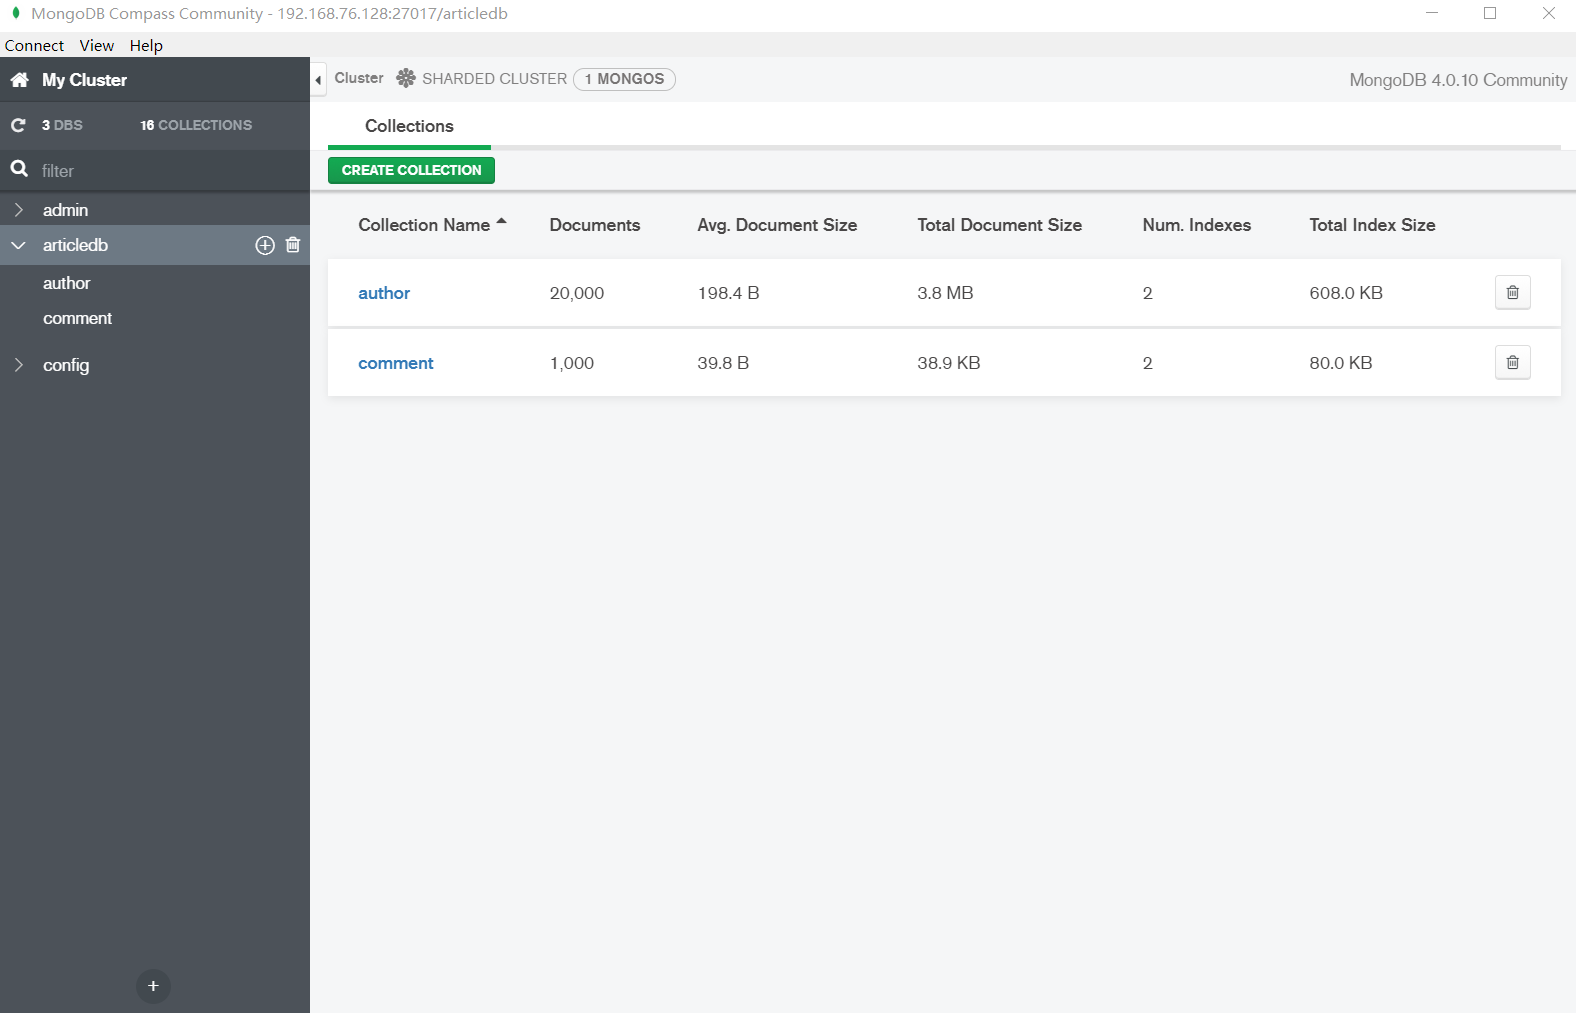
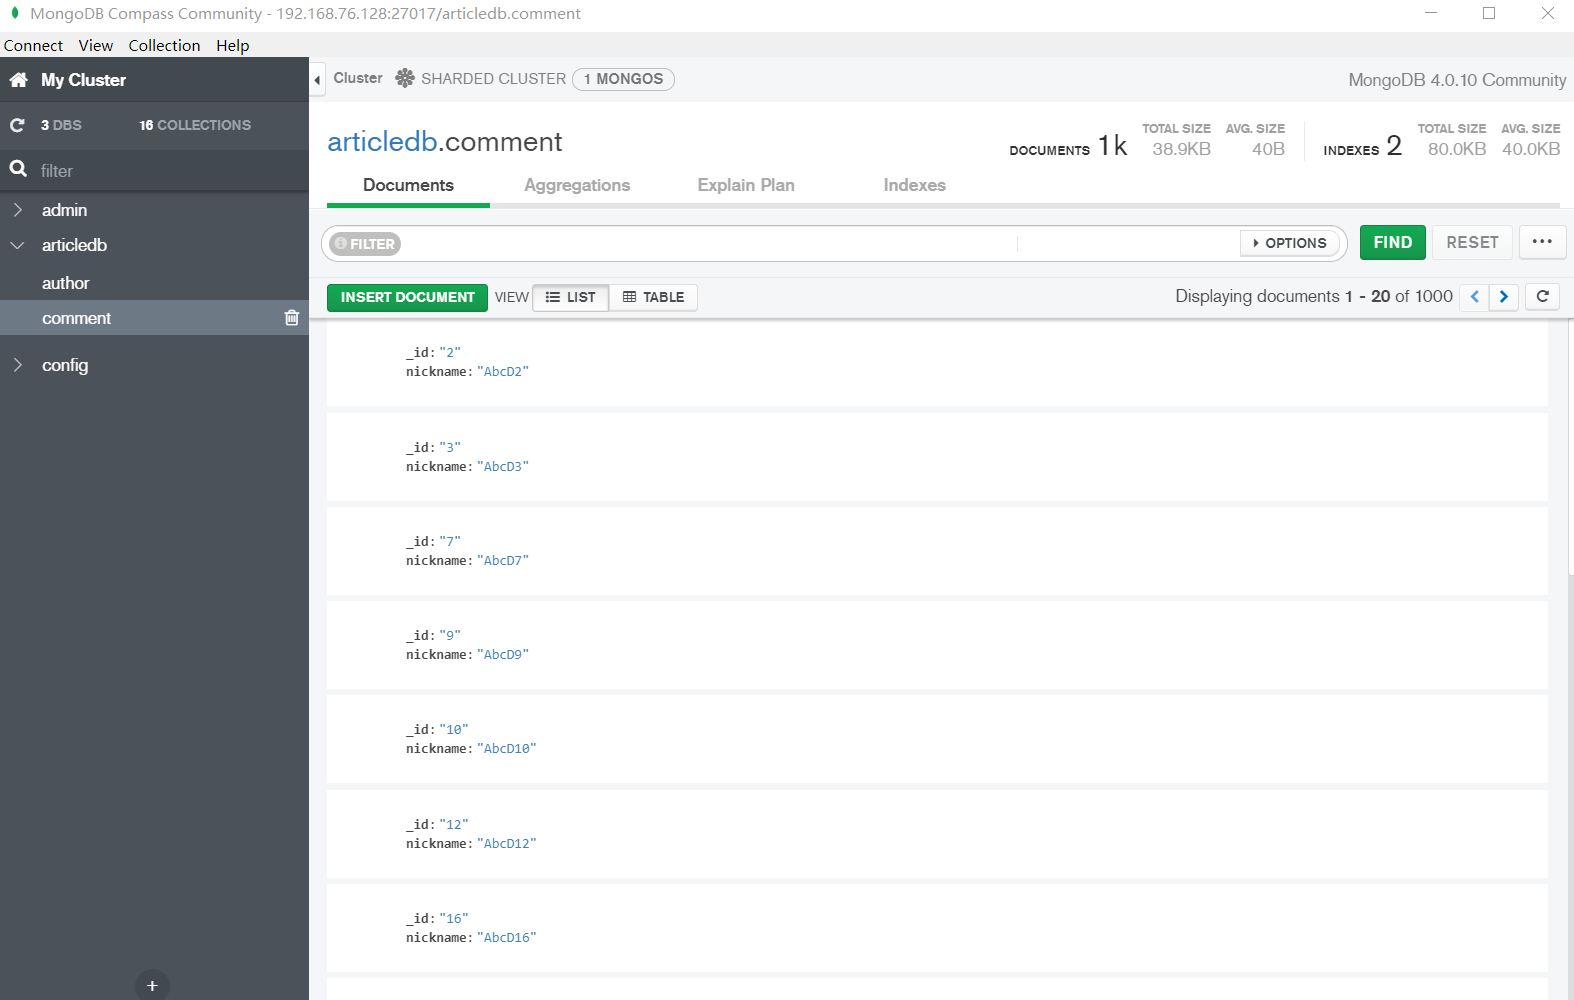
10.Compass 连接分片集群 11.SpringDataMongDB 连接分片集群 (1) application.yml
1
2
3
4
5
spring: data: mongodb: uri: mongodb://192.168.76.128:27017,192.168.76.128:27117/articledb
(2) 测试类
1
2
3
4
5
6
7
8
9
10
11
12
13
14
15
16
17
18
19
20
21
22
23
24
25
26
27
28
29
30
31
package com.learn.article.service;import com.learn.article.ArticleApplication;import com.learn.article.po.Comment;import org.junit.Test;import org.junit.runner.RunWith;import org.springframework.beans.factory.annotation.Autowired;import org.springframework.boot.test.context.SpringBootTest;import org.springframework.data.domain.Page;import org.springframework.test.context.junit4.SpringRunner;import java.time.LocalDateTime;import java.util.List;@RunWith(SpringRunner.class) @SpringBootTest(classes = ArticleApplication.class) public class CommentServiceTest { @Autowired private CommentService commentService; @Test public void testFindCommentById () { Comment comment = commentService.findCommentById("1" ); System.out.println(comment); } }